It’s not a glamorous device and offers only minimal functionality, but if you want a reliable door or window sensor that can run entirely on Matter over Thread, the Aqara P2 is a solid and cost-effective option.
Matter over Thread
The Aqara P2 supports Matter natively—without the need for a separate Aqara hub—via Matter over Thread. This is a separate mesh network, and doesn’t interfere with your Wi-Fi.
However, if this is your first Thread device, you should know that this means you’ll need a Thread Border Router. The good news is that several smart assistants are already Thread-enabled. If you have an Apple HomePod or HomePod mini and want to set up a Thread device for HomeKit, you’ll all set. This is what I’ll be using to review the P2 sensor.
For other ecosystems, you’ll need to check which hubs are Thread-compatible. However, just because the Aqara P2 doesn’t need a separate Aqara hub, doesn’t mean you won’t benefit from one. If you pair it with the upcoming Aqara M3 Hub, you’ll benefit from extra features, like a programmable button.
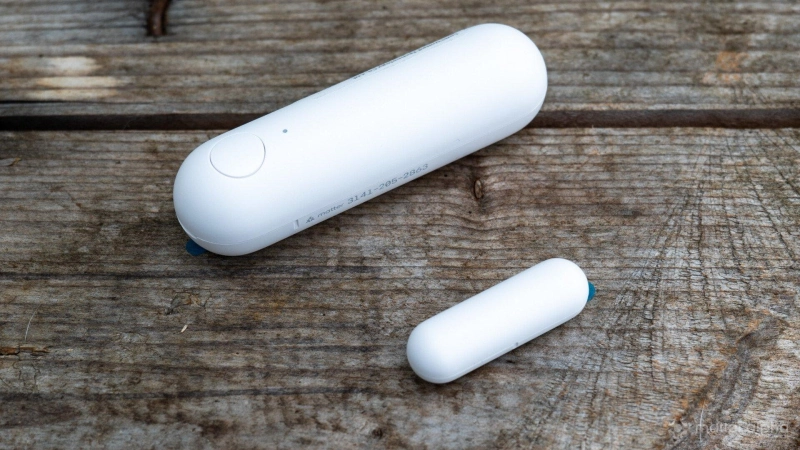
Design and Installation
The Aqara P2 doesn’t break any design barriers, consisting of a large white rounded block that houses the battery and reed sensor, plus a smaller white block with a magnet.

It doesn’t matter which part of the door or window you place them on, as long it they will separate entirely when opened or closed (so, not on the hinge, for instance).

Powered by a large CR123 1400mAh battery, the main P2 sensor body measures 77 x 22 x 22 mm, which is definitely one of the largest door and window sensors I’ve come across. There are no official figures for how long the battery should last, since it depends on how often the sensor is polled, what border router it’s paired with, and how good the signal is. Thankfully, you can get rechargeable CR123 batteries nowadays, but we’ll update this review once we’ve tested it for long enough to have a battery need replacing.
As a Matter device, you’ll need a code for the initial pairing. This is printed on the manual and on the side of the main P2 sensor housing. Normally I’d throw manuals into the manual box in the loft, but in this case, I’ve designated a special folder just for Matter devices. If you lose the manual and that code on the side is rubbed off, you won’t be able to pair it again.

The setup was mostly seamless in the iOS Home app. Just remove the battery cover and pull the plastic tab (a battery is already installed), then add an accessory and scan the code.
Initially, the pairing failed, but I realized this was because I was attempting to pair it in my office, and my HomePod Mini is downstairs. As mentioned, it’s a Thread device, so it must be set up within range of your Thread border router.
Adding to Google Home
One of the great things about the newest Matter updates is that a single device can be shared across multiple systems. After initially pairing with iOS HomeKit, I was able to go into the sensor settings, and tap on “Enter Pairing Mode”. This gave me a new pairing code, so I could swap over to Google Home, and add a new Matter-enabled device there by pasting in the code. Setup was as seamless as on iOS, and about a minute later, it was added to Google Home.
Usage and Notifications
I enabled notifications for any activity on the sensor, and installed it in its final location—a secret bookshelf door to my bunker (well, it was secret until I wrote that sentence).

The exact positioning of the magnet and sensor doesn’t matter too much; within an inch or so should still be enough to activate, but be sure to test first.
Peel off the backing, and push the sensor down for a few seconds to secure the sticky pad.

A smaller, flat magnet is also included in the package, though they are no fixings for that, so it’s assumed you’ll know what you’re doing if you go that route. As long as the sensor remains powered and within range of your Thread mesh, sensor status and notifications (if you have that enabled) should be almost instant.

The only trouble I had was during installation, when I took the sensor out of range of the Thread network to take some photos. It took a couple of minutes to rejoin the network. Though you’ll find a small button on the main body, it's only used to reset the device currently. Further functionality for that will be added in future if you use the new Aqara M3 hub.
Aside from basic notifications when the sensor is opened or closed, you’ll now be able to use the device status in your home automations. For me, this meant setting up an alarm in HomeKit to let me know if the door was open for more than 30 seconds. Unfortunately, setting this up was a bit more complex than you’d think, so here’s a quick tutorial on how you can do it.
Timed Door Left Open Alarm
We’ll need to work backwards on this, because you need to consider the alarm output before creating the alarm, and there’s one major limitation here: HomeKit automations (also accessible through Shortcuts on iOS) are unable to interact with your smartphone directly. While HomeKit can notify you when the sensor status changes, the automation you set up can’t do that.
In order to get around this, I’ve created an alarm lighting scene for my office, in which the ceiling light flashes red—but you could just as easily play a song on your HomePod. To set the functionality that triggers the alarm, open the Shortcuts app and head to the Automation tab, then click + to create a new one. Scroll down until you find Create a Home Automation. Choose A Sensor Detects Something, and select your door sensor.

Here you can set the parameters, but in my case, I want the sequence to start when the door sensors detects it’s been opened, at any time of day, regardless of who is home or not.
On the following screen, choose Convert to Shortcut. Delete the default actions, and instead search for Wait. Change the time to however many seconds you want to allow before triggering the alarm.
Next, add an If action, the condition being your sensor, and state being is not closed. Drag this action and hover over the If statement so it indents slightly, meaning it’ll trigger if this clause does. Leave the Otherwise and End if parts blank, and save.
Finally, add a Control my home action. Choose to set the scene as the alarm that you previously set up. This is also where you can tell your HomePod to play a specific song if you’d rather—just remember that you’re unable to trigger anything on your personal device.
Should You Buy the Aqara P2 Door and Window Sensor?
Since I installed it, the Aqara P2 has been rock solid, reliably and quickly delivering notifications when the bookshelf door is opened. I’m impressed with how simple it was to set up and how easy it is now to share a single sensor between different smart home ecosystems. It’s a shame it’s not easier to set up a timed alarm, but that’s a limitation of HomeKit rather than the Aqara P2 sensor.
Score: 9/10
Pros:
- Easy setup
- Reliable and fast notifications
Cons:
- Needs a Thread border router
- It has a button! But you can't use it to do anything yet.