Unlike Wi-Fi and Bluetooth, Thread-equipped network devices are still less popular and often limited by vendor support. This guide will walk you through the steps to build a locally operated OpenThread Border Router (OTBR) using the Thread 1.4 specification and integrate it with supported Matter platforms, including Google Home, SmartThings, and Home Assistant.
This guide is detailed to assist beginners, but if you're experienced and know exactly what you're doing, feel free to skip steps or refer to the official development guides provided by OpenThread or Espressif.
Note: This is an experimental project and may be less stable than mature Thread border router products available on the market.
1. Requirements
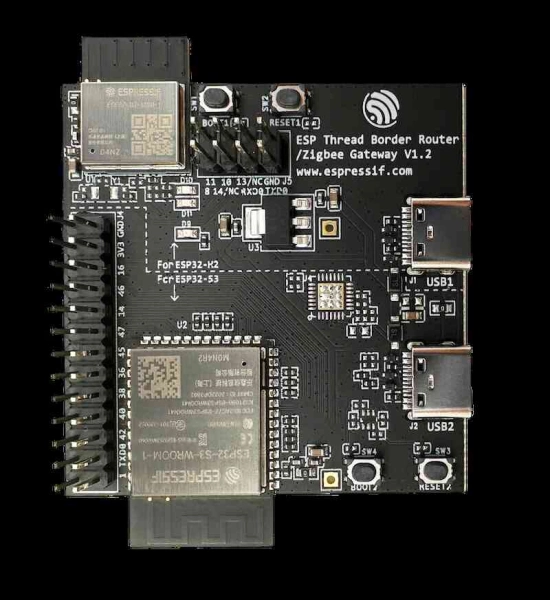
ESP Thread Border Router Development Board
Best Price
Also available at
- ESP Thread Border Router/Zigbee Gateway Board
- ESP Thread Border Router/Zigbee Gateway Sub-Ethernet (optional)
- Operating systems: Linux (including subsystems in ChromeOS or Windows) or macOS

2. Install Espressif SDK
- Open terminal: Launch the terminal application or the Linux subsystem terminal.
- Install essential software:
- Ensure you have basic software
git,python, andcmakeinstalled. You can verify this by typing their names into the terminal. If you receive an "unknown command" warning, install them first. - For Linux:
- Debian-based:
sudo apt install git python cmake - Red Hat-based:
sudo yum install git python cmake
- Debian-based:
- For macOS:
- Install Homebrew if you haven't already, then use it to install the necessary packages:
/bin/bash -c "$(curl -fsSL https://raw.githubusercontent.com/Homebrew/install/HEAD/install.sh)"
brew install git python cmake
- Install Homebrew if you haven't already, then use it to install the necessary packages:
- Ensure you have basic software
- Create a workspace:
This can be a folder you want to save all the files needed for this guide, repleace
/homewith your preferred path in the following steps.cd /home mkdir esp-otbr cd esp-otbr - Clone the Espressif SDK:
git clone -b v5.3.1 --recursive https://github.com/espressif/esp-idf.git - Install and configure the SDK:
cd esp-idf
./install.sh
. ./export.sh
Note: Every time you reopen a terminal window, run the following commands to ensure the SDK can be sourced globally:
cd /home/esp-otbr/esp-idf . ./export.sh - Clone the OTBR demo source code:
cd ..
git clone -b v1.1 https://github.com/espressif/esp-thread-br.git
3. Build firmware
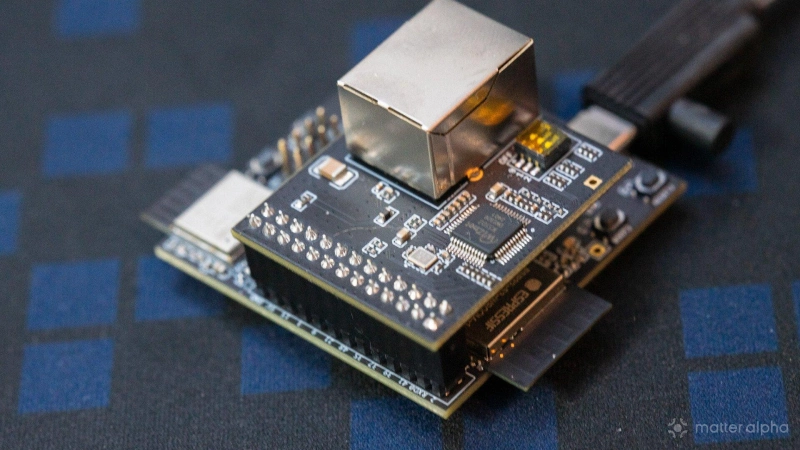
The main board consists of two parts: the ESP32-H2 handles the Thread radio, and the ESP32-S3 runs the OTBR, communicating with your Wi-Fi or Ethernet via the sub-board.
3.1. Build firmware for ESP32-H2
The build will take a while, depending on your system performance.
cd $IDF_PATH/examples/openthread/ot_rcp
idf.py set-target esp32h2
idf.py build
Please wait until you see the following outputs:Project build complete.
3.2. Configure the border router
cd /home/esp-otbr/esp-thread-br/examples/basic_thread_border_router
idf.py set-target esp32s3
idf.py menuconfig

This is a crucial step. After running the last command, a menu will appear. Use the arrow keys to navigate to Example Connection Configuration.
- Using Wi-Fi:
- Enable the Connect using Wi-Fi option.
- Fill in your Wi-Fi SSID and password.

- Using Ethernet (optional):
- If you have the Ethernet sub-board, attach it as shown in the diagram below.
- Disable the Wi-Fi connection in the menu.
- Enable Connect using Ethernet interface.
Note: Attach the Ethernet Sub-board as shown in the diagram below.

Configure IO for the sub-board on the menu:
Espressif IoT Development Framework Configuration
[ ] Connect using WiFi interface
[*] Connect using Ethernet interface
(2048)  EMAC_RX task stack size
      Ethernet Type (W5500 Module)  --->
(2)     SPI Host Number
(21)    SPI SCLK GPIO Number
(45)    SPI MOSI GPIO Number
(38)    SPI MISO GPIO Number
(41)    SPI CS GPIO Number
(36)    SPI Clock Speed (MHz)
(39)    Interrupt GPIO Number
(40)    PHY Reset GPIO Number
(1)     PHY Address
[*] Obtain IPv6 Address
     Preferred IPv6 Type (Local Link Address)  --->
Return to the main menu, navigate to the ESP Thread Border Router Example tab, and enable the following options:
- Enable the automatic start mode in Thread Border Router
- Enable the web server in Thread Border Router

Press S to save the configuration, then use ESC to exit the menu.
3.3. Flash the firmware to the development board
- Connect the development board: Use a USB cable to connect the USB2 port marked on the board to your desktop. A red LED should light up on the board.
- Identify the device path:
The terminal may display warnings like:idf.py -p ${PORT_TO_BR} flash monitor
In this case, replace--- esp-idf-monitor 1.5.0 on flash 115200 --- Quit: Ctrl+] | Menu: Ctrl+T | Help: Ctrl+T followed by Ctrl+H --- Connection to flash failed. Available ports: /dev/ttyACM0${PORT_TO_BR}with/dev/ttyACM0. You may want to remove other USB devices to find the right one to flash. - Flash and monitor logs:
Your host machine will start building the firmware and flashing it to the development board. This process may take some time, depending on your system's performance.idf.py -p /dev/ttyACM0 flash monitor - Verify connection
Once the flashing process is complete, the terminal will display logs from the board. If you're using the Wi-Fi option and encounter a connection failure, manually connect using:wifi connect -s your_wifi_name -p your_wifi_password - Access the OTBR web interface:
- Open your browser and navigate to: http://esp-ot-br.local/index.html
- If this doesn't work, check your router's admin panel for the OTBR's IP address and visit http://<IPv4Address>/index.html instead.

4. Configure your OTBR
Once the web interface is accessible, you can either form a new Thread network or join an existing one. If you're new to Thread and don't have an existing Thread border router at home, you may want to create a new network.
4.1. Home Assistant
To integrate with Home Assistant:
- Access Home Assistant dashboard:
- Navigate to Settings > Integration > Thread.
- Click Configuration.

- Add the OpenThread border router:
- In the top right corner, click the three-dot menu button and select Add an OpenThread Border Router.
- Enter
http://esp-ot-br.local/orhttp://<IPv4Address>/. - Home Assistant will complete the setup and add the OTBR to your configuration. You can then integrate it into an existing Thread network managed by Home Assistant or use it as the primary router for adding new devices.

4.2. Google Home
For integrating with Google Home and SmartThings without a Thread border router-equipped hub:
- Requirements:
- An Android phone.
- Home Assistant Companion App.
- Sync Thread credentials:
- Open the Home Assistant Companion App.
- Navigate to Settings > Companion App > Troubleshooting > Sync Thread Credentials.
- A confirmation pop-up will appear once the synchronization is successful.

- Add Matter-over-Thread devices:
- Use the Google Home app and a basic Google hub like Nest Mini Gen 2 to add Matter-over-Thread devices.
4.3. SmartThings
To integrate with SmartThings:
- Retrieve the network key:
- From the debug monitor – which prints logs – enter:
networkkey - Alternatively, access the OTBR web dashboard. Note that this method may not always work reliably.
- From the debug monitor – which prints logs – enter:
- Using Home Assistant:
- If you've added the OTBR to Home Assistant, you can obtain the network key from its TLV dataset.
- Navigate to the Network section in Home Assistant.
- Click the top right icon to reveal more information.

- Copy the entire TLV string and paste it into a parser like EMVLab TLV Parser.
- Locate the key under
05, which SmartThings requires when adding a Matter-over-Thread device without a Thread-enabled SmartThings hub.
Now, you have successfully configured a localized OTBR. You can check its Thread version via mDNS explorers like Discovery on iOS, search esp-ot-br under _meshcop._udp., the value of tv is the Thread spec version of TBRs.

(Source: Espressif and OpenThread)